Uploading & Activating the plugin - Using CPanel
Last modified on 15 Feb 2017 02:18 PM
Use this if your host provides a control panel called Cpanel, the interface may be different if your hosting provider is using a different theme.
Very first thing you need to do is, login to your VIS members area, go to “My blogs” and click on download icon for the blog you would like to install the plugin on.

This is important that you select download for the specific blog as it will download the appropriate version the blog has licensed to.
Step 1: Login to your Cpanel where you have installed the Wordpress.
Step2: Locate "File Manager" and click on it.

Step3: Locate the folder where your wordpress is installed and then go to /wp-content/plugins/ folder.
This is very important, if you upload in the wrong folder, WordPress will not recognize the plugin. If you are not sure, please contact your hosting provider, and they should be happy to help you finding the folder.
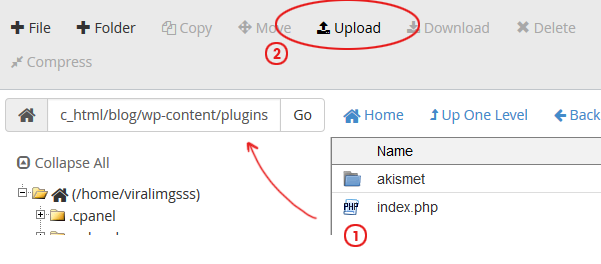
Step 4: Click on upload icon, and select the zip file you have downloaded
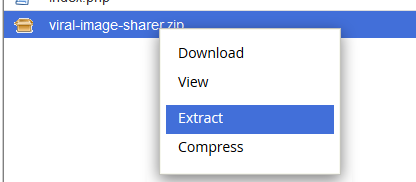
Step 5: Reload the folder view,  ... then select the zip file you have just uploaded, right click on it and click on extract.
Step 6: Now go back to your wordpress admin area. Click on Plugins > Installed Plugins and click on on Activate link under "Viral Image Sharer"

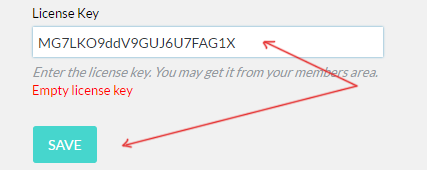
Step7: Click on Activate the License, which will then ask you to enter the license key

Step8: You will need to go back to the VIS members area to get the license key. Go to my blogs and click on the eye icon to get the license, copy it

Step9: In Wordpress, paste the license key and hit “Save” button.